Configure Product Attributes
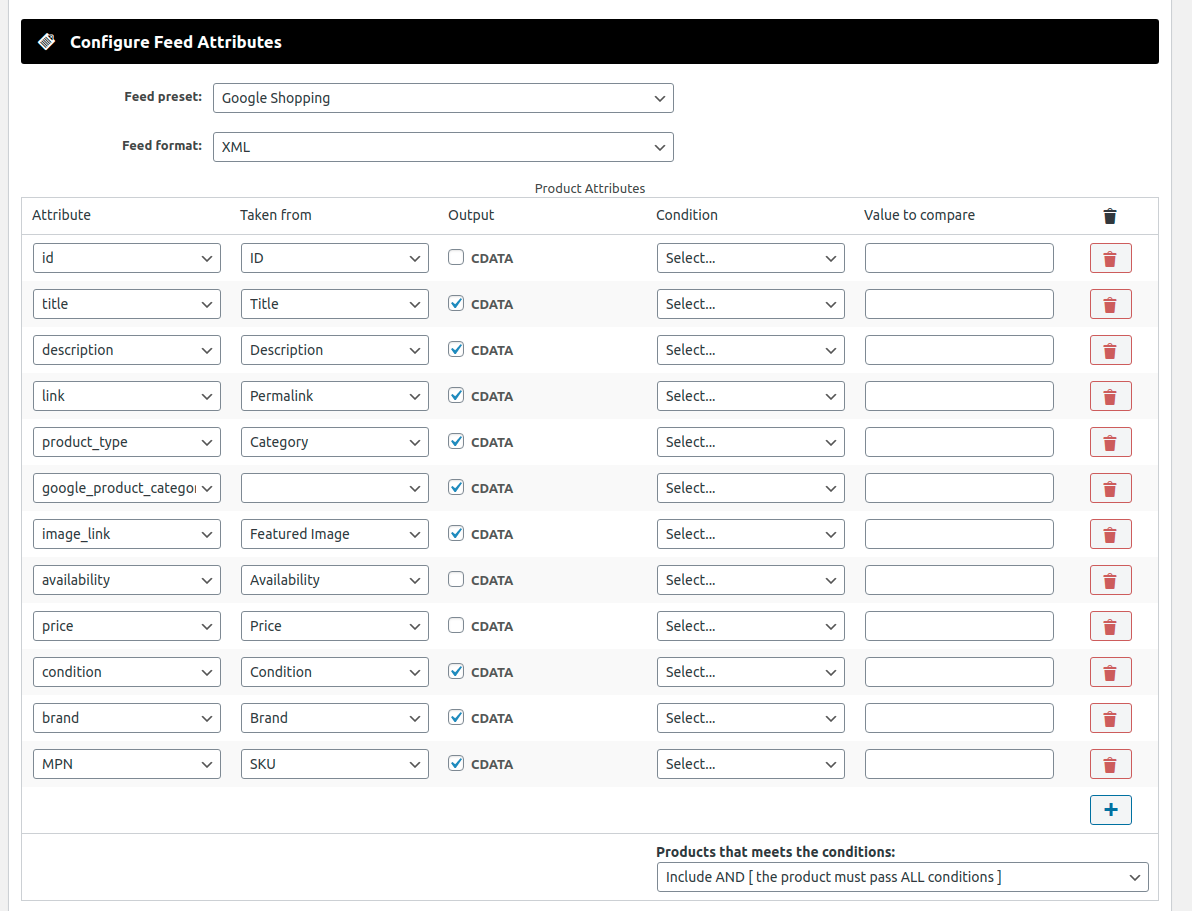
In the previous section you learn how create a new feed based on a feed’s preset. Let’s use the Google Shopping preset as example:

Product Attributes
The Product Attributes table is the representation of the feed preset loaded, Google Shopping in this case. If you left this as is, it’s guarateed that you’ll get a ready-to-work feed. However, you can customize it in order to fit your needs. Let’s dive into it.
Table Structure
The table body is made of 6 columns, being each row a product attribute to be included in the feed product’s section. In the case of the Google Shopping merchant this will be the <item> tag. Each column is described as follow:
Attribute
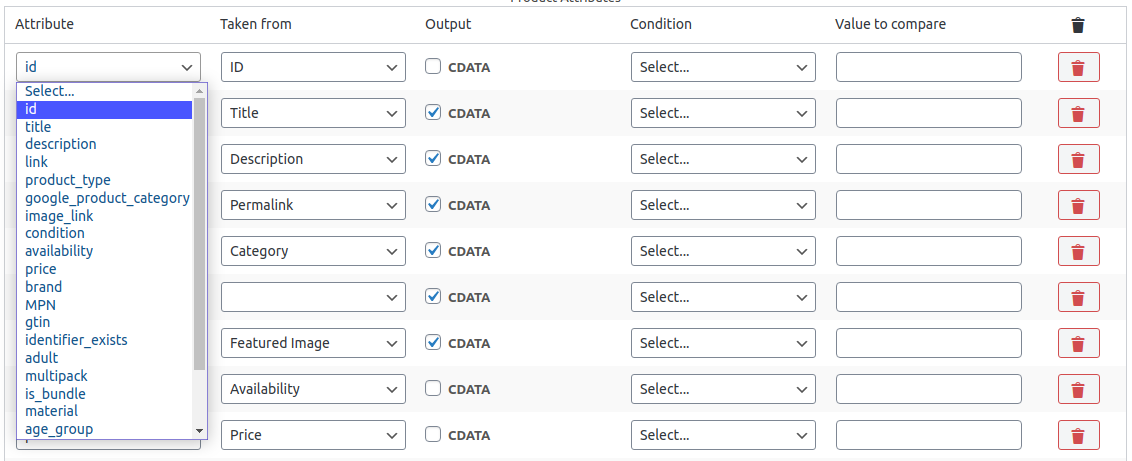
Here are listed all the available tags. The selected ones are the required by the loaded preset.

Taken from
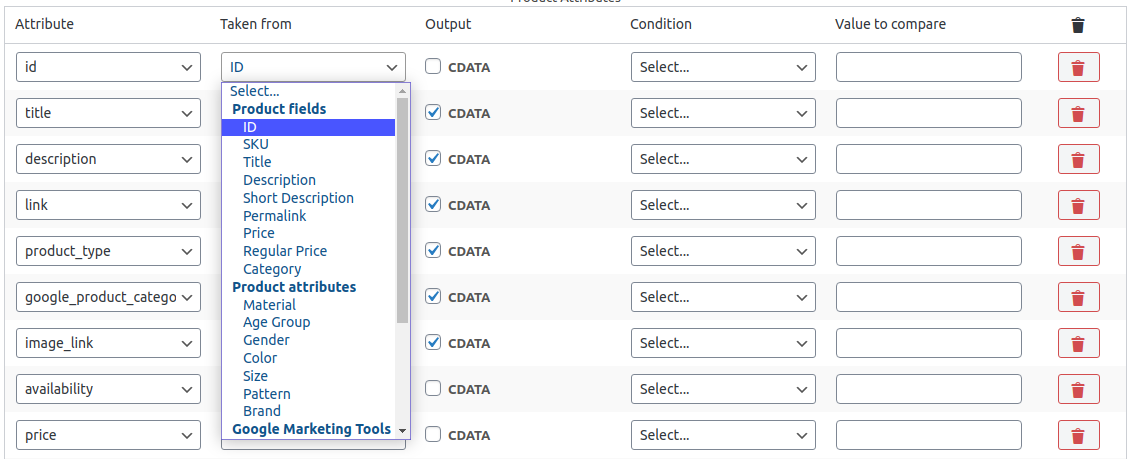
This are all the sources where you can obtain the value that will have the attribute field.

Again, when you load a preset, the best choices are selected based on the merchant documentation and recomendations. But you can change it to fit your needs. For example, the attribute price took his value from the price product field, but you can change it to the regular price field, which is the price with taxes.
You may notice that the row with attribute google_product_category has the Taken from field empty. You’ll find the answer in the Taxonomies section.

Output
This is simply a checkbox that allows you to put the value inside the <![CDATA[ ]]> enclosing tags. Normally you don’t need to modify this.
Filters Columns
You see in the New Feed section that you can filter products by type and categories. But this isn’t very flexible. Every row has a comlumn named Condition and other one named Value to compare. You can set one conditional for every value and then select what to do with the products that meets that conditions.
Condition
This is a select input that allows you to choose one of multiple comparison conditions.

Note that some comparison symbols are for numbers and some are for text.
Value to compare
This is the static value against the tag value will be compared using the comparison condition. Keep reading for example.
What to do with the products that pass the conditions?
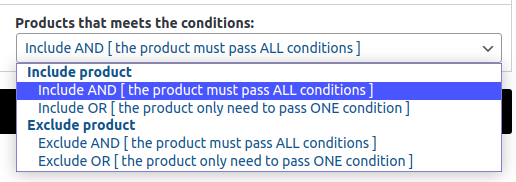
In the table footer you’ll see a select with the label Products that meets the conditions and 4 options inside, 2 for including and 2 for excluding.

Example
Let’s see this with one example. Supose that you add a filter in two rows, one in the price tag row and the other in the link tag row. For the price we’ll set the condition to Greater than [ > ] and the value in 20.00. For the link we’ll set the condition to Contains [ ⊆ ] and the value to hoodie. In the Products that meets the conditions select we’ll decide what to do with the products that pass the conditions and how we want it to pass the conditions.
We have 4 options:
-
Include AND: This option will include the product only if all the conditions evals to true, that is, the product’s price is greater than
20.00and thehoodieword is included in its link. -
Include OR: This option will include the product only if one condition evals to true, that is, all the products with price greater that
20.00or thehoodieword is included in its link, but not necessarily both. -
Exclude AND: This option will exclude the product only if all the conditions evals to true. It’s the same example as in Include AND but excluding the product from the feed.
-
Exclude OR: This option will exclude the product only if one condition evals to true. It’s the same example as in Include OR but excluding the product from the feed.
Misc
Please, read the specific merchant documentation before modify the tags loaded by the preset.
Delete button
At the end of every row we have a button with a trash icon, here you can remove one tag from the feed.
Add tag button
It’s placed in the last row of the table body with a plus icon, here you can add rows (tags) to your feed.